Monday, October 13, 2008

FRUGAL HEALTH TIP #4: FIGHTING COLDS AND FLU

Olive oil, lemon, rosemary.Image by SteffanyF! via Flickr

The cost of doctor visits and prescription drugs is unfortunately, beyond the means of many Americans today. Wintertime colds and flu can cause lost days from work, and make a body feel miserable, so I have complied some frugal, effective ways to alleviate those rotten symptoms. Why not give them a try?

Drink hot liquids. They relieve congestion, prevent dehydration and soothe inflamed membranes that line your nose and throat.

Take steamy showers. You will feel relaxed and your nasal passages will clear and your lungs will open up.

At bedtime, sleep with an extra pillow under your head. It will help to drain your nasal passages.

To calm a chronic cough, dissolve in one cup of boiled water, one tablespoon of honey and ¼ teaspoon of cinnamon. Taken periodically throughout the day, it will also clear out your sinuses.

To alleviate a sore throat, and eliminate hoarseness, dilute the juice of one fresh lemon in one cup of boiled water. Gargle with it several times a day. It will also help with canker sores, or lesions inside the mouth.

To ease the ache of the flu, take a nice warm shower or bath. Add 20-30 drops of lemon oil to one cup of sunflower oil and massage it well into your skin. Cover yourself with a good blanket, and go to sleep. By morning your aches and pains will be gone!

For respiratory ailments such as cold, asthma, bronchitis and sinusitis, put a few drops of tea tree oil in your vaporizer. Inhale the steam and you will feel wonderful, blessed relief!

Here are two food remedies to try:

Eat plenty of garlic. It has anti-bacterial and immune boosting properties. You can eat it raw in garlic bread and in salads, or infused in vinegar for cooking.

You can also try this quaint suggestion, handed down for generations by little old grandmas!

Crush a few garlic cloves and cover them in olive oil. Let them soak for about half an hour. Rub the garlic oil onto the bottoms of your feet, cover them with warm socks, and go to sleep. The garlic is absorbed into the bloodstream and carried to the lungs, where it does a wonderful job of clearing out congestion. You may have a little garlic taste in your mouth on rising, but a good tooth brushing should take care of any unpleasant odor.

Make this effective tea:

To a pot of boiled water, add a one inch piece of grated ginger, four tablespoons of freshly squeezed lemon juice and three tablespoons of honey. Cover and let the mixture steep for about 20 minutes before drinking it. Ginger and honey are great immune system boosters, and lemon juice is a good source of vitamin C.


Irene Helen Zundel is a freelance writer, educator and mother, and an expert in child development, home schooling and creative parenting and home making.
Visit her online at http://www.irenehelenzundel.com

Reblog this post [with Zemanta]

Friday, September 19, 2008

FRUGAL HEALTH TIP #3: TEA TREE OIL

Glass vial containing Melaleuca Alternifolia E...Image via Wikipedia

Tea tree oil is a product that I really love! I use it daily around my house.

Since it is effective against viruses, fungi, and bacteria, the three types of infectious organisms, it is a medicine cabinet in a bottle.

Here are some of the traditional uses of tea tree oil:

For respiratory ailments such as cold, asthma, bronchitis and sinusitis, put a few drops of tea tree oil in your vaporizer. Inhale the steam and you will feel wonderful, blessed relief!

As a first aid remedy, tea tree oil can be used to treat cuts, abrasions and scrapes. The anti-bacterial properties of tea tree oil prevent wounds from becoming infected.

Tea tree oil is also a traditional remedy for athletes foot fungus, blisters, burns, cold sores and acne. Dab a little on a damp cotton ball and treat the affected areas.

At home, I disinfect my toothbrush with it, and add a drop or two to my mouthwash. It is a common ingredient in toothpastes now, because it is wonderful at preventing gum disease.

I also add a few drops to a warm, damp washcloth and clean my face with it. It is refreshing and clarifying, and works as well as any pricey toner you get at a cosmetics counter! My son uses it in soap form to prevent acne breakouts.

One tiny bottle lasts me weeks! I don’t have to buy any expensive facial cleansers, antibiotic creams, cold or sinus remedies, or special mouthwashes.

Pick up a bottle for yourself!

Irene Helen Zundel is a freelance writer, educator and mother, and an expert in child development, home schooling and creative parenting and home making.
Visit her online at http://www.irenehelenzundel.com
Reblog this post [with Zemanta]

Saturday, September 13, 2008

Homemade Lavender Bath Products


Lavender is lovely! It has a beautiful fragrance, and many healing properties. It is known to be a great nerve tonic, easing depression and anxiety and relieving stress. It is calming and can help induce sleep in insomniacs. It even has pain killing properties and can ease the agony of a migraine headache!

It is also widely used in natural skin care products. Lavender is antifungal and antiseptic so it is an effective acne treatment. It helps sooth sunburn, and speed healing of cuts and abrasions.

Below you will find a few recipes for lavender bath products that will baby your skin and help you unwind after a hard day. Why not give them a try?


Homemade Lavender Bath Cookies


2 cups finely ground sea salt
½ cup baking soda
½ cup cornstarch
2 tablespoons light oil
1 teaspoon vitamin E oil
2 eggs
25 drops of lavender oil

Preheat your oven to 350 degrees.
Mix together all the ingredients.
Roll the dough into 1 inch balls, and place them on an ungreased cookie sheet.
For an extra nice touch, decorate the dough with dove pieces or rose buds.
Bake the cookies for about 10 minutes or until they are lightly browned.
Be careful not to over bake them. Cool completely.
To use: Drop 1 or 2 cookies into a warm bath and allow to dissolve.

Relaxation Herbal Bath Tea


1 cup rosemary
2 cups lavender
2 cups rose petals
1 cup mint

Mix these dry ingredients together and keep in a sealed, dry jar. Use about ½ cup for each bath.
To use: Pour 1-2 cups boiling water over the herbs and steep for 15-20 minutes. Add to your bath water.

Lavender Herbal Milk Bath

2 cups cornstarch
2 cups dry milk powder
2 tablespoons of dried lavender, crumbled

Mix these dry ingredients together. Store them for future use in an airtight container.
For your bath, put about ½ cup of the mix into cheesecloth or a muslin bag. Be sure to tie it tightly. Add to your bath. You can tie kitchen string to the bag and float the bag in your bath as the water runs.

Homemade Lavender Bath Salts


1 cup Epsom salts
5 or more drops of lavender essential oil

Mix them together and keep in a covered jar. Allow the salts to sit for a few hours or overnight.
Add about ½ cup to running bath water.
To make it extra soothing to your skin, add 1 cup baking soda.
For a moisturizing effect, add 2-3 tsp. of honey.

Homemade Body Butter

4 TBSP. shea butter (found at any natural foods store)
1 to 2 TBSP. extra virgin olive oil
½ tsp. Vitamin E oil
5 drops lavender essential oil
3 drops geranium essential oil
2 drops rose essential oil

Place the shea butter and olive oil in a microwave-safe bowl and microwave 90 seconds (or until the shea butter is completely dissolved).
Allow the mixture to set for 30 minutes.
After it has cooled, add the Vitamin E and essential oils.
Stir well and let the mixture set for 12 hours.
Stir again after 12 hours and pour into a decorative container.


Irene Helen Zundel is a freelance writer, educator and mother, and an expert in child development, home schooling and creative parenting and home making.
Visit her online at http://www.irenehelenzundel.com
Reblog this post [with Zemanta]

Tuesday, September 9, 2008

Make a Cooking Wreath with Herbs from your Garden

Oregano growing in a field.Image via Wikipedia

Herbs are wonderful things! They flavor our food, heal our minor ailments, beautify our gardens, and scent our homes. They are a joy to grow and use.

Did you have an exceptionally good yield from your garden this year? Do you have enough spices stored away for cooking?

Why not take your excess herbs and craft beautiful wreaths for yourself, and friends and family? They are easy to do, both useful and beautiful, and a homemade gift that is sure to be appreciated!

Following, you will find easy instructions for drying your herbs and arranging them into a variety of decorative wreaths. Why not give it a try?

To dry the herbs:


Cut fresh herbs and stems at least 6 inches long.
Tie the herbs in bundles with string and hang them upside down to dry for about two weeks.
Or, if you prefer, you can dry them in a single layer in a food dehydrator for 3-4 hours.

To make a wreath, you will need the following:


9 inch white willow wreath
8 small bundles of various dried herbs (try for example, basil, bay leaves, chive flower heads, dill, oregano, parsley, rosemary, and thyme)
30 dried red chili peppers
24-gauge green wire
Fishing line (6 pound test or stronger is best)
4 strands of natural raffia

Cut two 12 inch lengths of wire. String the red chili peppers onto each length. Bunch the wired peppers together, and wrap them onto the willow wreath using additional wire.

Cut a 2 yard length of fishing line and tie the end onto the back of the wreath.

Place one bundle of herbs on the front of the wreath, besides the peppers. Wrap the fishing line around the bundle and the wreath once or twice to hold them in place.

Place the leafy portion of the next bundle over the stems of the previous bundle. Secure with fishing line, and repeat until the ring is complete (try to keep the look of the wreath balanced by alternating bright and bushy herbs as you go around the circle).

Tie the end of the fishing line onto the back of the wreath and trim off the excess.

Tie the strands of natural raffia into a bow and place it at the top of the wreath.

Hang an attractive pair of small scissors from the wreath, so you can easily snip off what you need when you are cooking.

NOTE: To best preserve the look of your wreath and the flavor of the herbs, avoid hanging it in direct sunlight, or in areas of excessive moisture.

You might also want to create a wreath centered around a theme.


Does your family love homemade pizza? Make an Italian wreath with basil, oregano, garlic, and red peppers.

Are you crazy for Mexican food or homemade fresh salsa? Try designing a wreath with a variety of peppers, fresh cilantro, garlic, and onion chives.

For those of you who enjoy sipping herbal teas, try making a wreath with anise, chamomile, cloves, dandelion, lemongrass, mint, raspberry leaves and sassafras.

To make a lovely, fragrant wreath to scent your home, use fennel, lavender, mint, rosemary, and thyme.

Try decorating the wreaths with nice extra touches. For your pizza wreath, adorn it with a red and white checkered bow, reminiscent of the tablecloths you see in Italian restaurants. Add a little sombrero or dangle a pair of castanets from your Mexican wreath. Hang a tea infuser from your herbal tea wreath. Add a nice lace and ribbon sachet pillow to your fragrance wreath. The possibilities are endless — just use your imagination!

To find more beautiful herbal and garden crafts, check out the Garden Crafts Special Issue published by Crafts magazine.

Or visit their website at http://craftsmag.com.


Irene Helen Zundel is a freelance writer, educator and mother, and an expert in child development, home schooling and creative parenting and home making.
Visit her online at http://www.irenehelenzundel.com

Reblog this post [with Zemanta]

FRUGAL HEALTH TIP #2-SEVEN SUPER USES FOR LEMONS IN HOME REMEDIES


To stop a nosebleed, saturate a cotton ball with a mixture of equal parts of lemon juice and water. Dab the cotton repeatedly onto the nasal mucous membrane. The astringent properties of lemon juice cause the tissues to draw together and the bleeding to stop.

To alleviate sore throat and hoarseness, dilute the juice of one fresh lemon with one cup of hot water. Use it as a gargle three times a day. This is also an effective remedy for canker sores or lesions inside the mouth.

Diluted lemon juice also takes the pain out of sunburn. Merely saturate a cotton ball with a mixture of equal parts lemon juice and water, and dab it gently on the affected skin.

Are you having trouble sleeping? Pour one cup of boiling water over one tablespoon of dried lemon leaves, and steep for ten minutes. Drink one cup of tea an hour before bedtime. You will be seeing the sandman soon afterwards!

To purify the air in a sick room, mix together 8 drops of lemon oil, 1 drop of clove oil, 2 drops of thyme oil, and 1 drop of tea tree oil and heat it in a diffuser.

To fight fatigue, mix 2 drops of lemon oil and 2 drops of peppermint oil in a small bowl. Dip a cold, moist cloth into the mixture. Lie down in a quite place, and drape the cloth like a compress over your forehead and temples. Breath deeply. In a few minutes, you will feel refreshed and renewed.

To ease the ache of the flu, take a nice warm shower or bath. Add 20-30 drops of lemon oil to one cup of sunflower oil and massage it well into your skin. Cover yourself with a good blanket, and go to sleep. By morning your aches and pains will be gone!


Irene Helen Zundel is a freelance writer, educator and mother, and an expert in child development, home schooling and creative parenting and home making.
Visit her online at http://www.irenehelenzundel.com

Reblog this post [with Zemanta]

Saturday, September 6, 2008

Why We Should Teach our Children to be Frugal


Our children today are raised in a very materialistic society. They are marketed to constantly by predatory advertisers. Companies develop shows that revolve around an entire line of toys, games, and videos. The message to kids today is buy, buy, buy!

In school, a child’s popularity is often a direct result of having the most and best toys, or from having the nicest clothes. The message is sent that a person’s self-worth is directly tied to their ability to own things. How sad!

Teaching a frugal lifestyle to kids is the antidote to this sickness, and has many benefits.

For example:

Frugal children are creative. They learn to think outside the box, and see multiple uses for common things. A piece of aluminum foil becomes more than something to wrap vegetables in on the grill. It becomes a way to correct the magnetic field of your TV set, a way to remove rust from your car’s bumper, a scissors sharpener, and a way to remove static cling from clothes.

Kids that are creative can go on to invent new things and find solutions to problems that plague society. They embrace multiple possibilities and solutions for things. What a great mindset to cultivate in a child!

Teaching frugal living also helps kids learn to manage their time and resources and not be wasteful. Are you out of wrapping paper for a present for a birthday party? Don’t hop in the car and spend your gasoline and time getting an item or two.

Encourage your child to make some wrapping paper. Surely there are comics, colored paper, aluminum foil, stickers, glitter, markers, pieces of cloth, felt, crayons etc. in your home they can use?

Making do with what you have is a good thing to teach a child. As adults, they won’t always have the financial wherewithal to indulge every purchasing whim, nor the time to drive, shop and wait in line for small items. Being resourceful with what lies at hand is a way to instill some sense of basic restraint and discipline.

Frugal living also improves the quality of your family’s life. You don’t spend money impulsively and waste your time and resources running around shopping. The money you save can be used for the enrichment of your own family.

What you save on buying second hand school clothes, packing homemade lunches, and setting reasonable limits on Christmas shopping, can be put towards a great family vacation, for example.

Enlist your kids in the selection of what to cut back on and what to save for. They will become willing partners in your plans to conserve, and learn lots in the process.


Irene Helen Zundel is a freelance writer, educator and mother, and an expert in child development, home schooling and creative parenting and home making.
Visit her online at http://www.irenehelenzundel.com

Thursday, September 4, 2008

FRUGAL HEALTH TIP #1


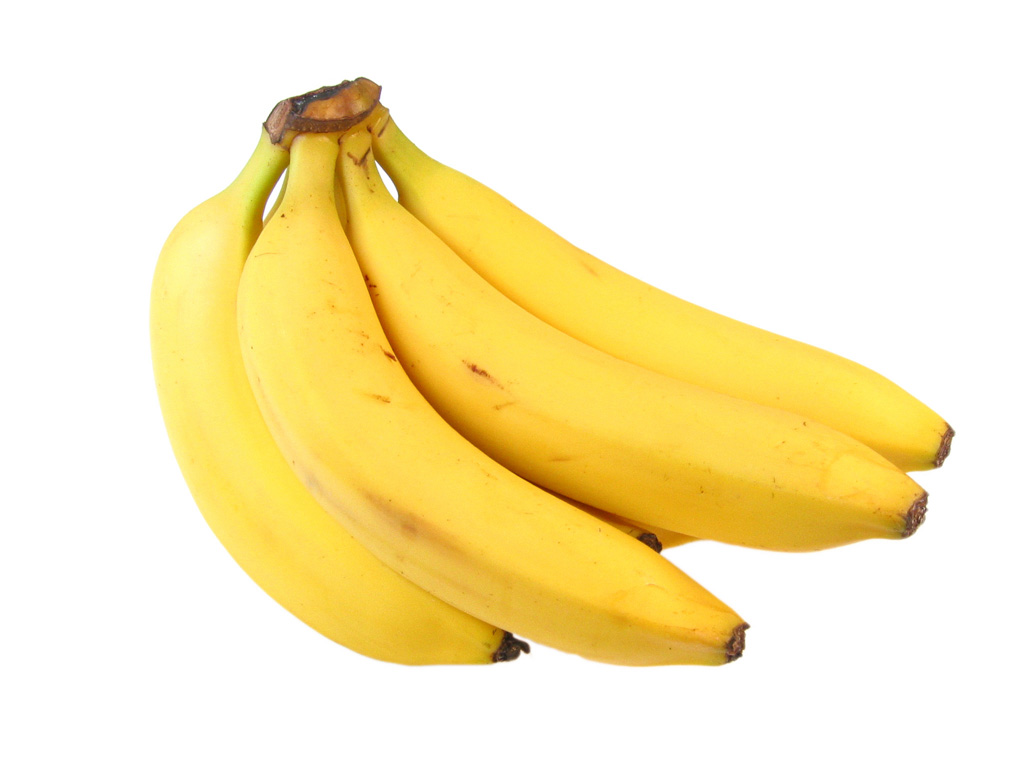
THE BENEFITS OF BANANAS

Tens of millions of Americans have no health insurance. They simply can't afford it!
The cost of prescription drugs is outrageous, and he loss of wages from missing work due to illness can be a real budget killer for many.

It is best to try and stay as healthy as possible, by eating plenty of nutritious foods. Bananas are a great choice to add to your diet. They are low cost, easily available, and have numerous health benefits.

Here are just a few:
Bananas are high in potassium, the mineral the body utilizes to normalize your heartbeat, send oxygen to the brain and regulate the balance of water.

Doctors routinely prescribe potassium for patients with high blood pressure. According to new research in the New england Journal of Medicine, potassium can lower blood pressure and reduce the risk of stroke by about 40%!

Bananas are the only raw fruit that people afflicted with ulcers can eat. That is because they neutralize acidity in the body, and coat the lining of the stomach so it feels less irritated.

When we are stressed, our metabolic rate rises and levels of potassium are depleted. We can then feel edgy and irritable. Eating bananas restores the balance of potassium and that stressed out feeling subsides.

Bananas are also a good source of vitamin B6, a mood stabilizer. Women with PMS can benefit from eating bananas to help with mood swings during their menstrual cycles.
They also contain other B vitamins that help calm the nervous system.

Constipation can be a thing of the past for you, if you consume bananas. They ae high in fiber, making laxatives unnecessary.

Are you anemic? Bananas are high in iron, which is needed for the production of healthy blood.

A school in England gave students a banana at lunch and for a daytime snack, and found pupils were more alert and able to concentrate on their lessons.

Finally, bananas are a great cure for hangovers! Make a banana milkshake sweetened with honey. The milk re-hydrates you, the bananas coat your jumpy stomach, and the honey replenishes your depleted blood sugar that is giving you that pounding headache.


Irene Helen Zundel is a freelance writer, educator and mother, and an expert in child development, home schooling and creative parenting and home making.
Visit her online at http://www.irenehelenzundel.com

Reblog this post [with Zemanta]

Monday, September 1, 2008

Crazy Uses for Cola Drinks!


Everybody has cola in their house, new and bubbly, and even old and flat. Believe it or not, it is not just for drinking!

Here are a few surprising uses for this common soft drink:

For your car:

Use it to debug or deice your windshield. Get rust off your bumper by dipping a crumpled piece of aluminum foil in cola and rubbing on the affected area. It is also great for removing oil stains from concrete. Simply pour the soda on the greasy area, let it sit for a while and then hose it off.

In your yard and garden:

Spray your lawn with it once a month for greener grass. Also use it as an effective bug repellent. Mix a 12 oz. can of cola with 1 cup of ammonia and 1/4 cup of liquid dish soap, and spray it on your lawn or plants.

Around the house as a cleaning product:

Use it to clean your grout. Simply pour it on the tile and scrub it with a toothbrush. Do you have a burnt pan? Pour cola in it and bring it to a boil. The baked on crust will come right off! De-scale your tea kettle with it as well. Let the soda sit in the kettle for a day and then rinse it thoroughly and wipe it dry. You can even use cola to get permanent marker out of carpet! Pour coke oon the stained area and let it sit a few minutes. Scrub it gently with a brush. Follow up with soapy water and blot the area dry. In the laundry room, you can remove the fish smell from clothes by washing your laundry in it.

Is your swimming pool rusty? Add two 2 liter bottles of cola to the water and the rust will be gone!

If you go to the beach and get stung by a jelly fish, pour cola on it right away. It will relieve the pain.

As a hair product:

Do you want perfect curls? Pour it on your long hair and let it soak in a few minutes, then shampoo it as normal. If your dye job came out too dark, you can use diet cola to fade or remove the dye. (Note: You must use diet cola for this to work.) Did you get gum in your hair? Soak it in a bowl of cola for a few minutes and then wipe. The gum will come right out!


Irene Helen Zundel is a freelance writer, educator and mother, and an expert in child development, home schooling and creative parenting and home making.
Visit her online at http://www.irenehelenzundel.com

Reblog this post [with Zemanta]

Wednesday, August 27, 2008

Cost-Cutting Uses for Kitty Litter


Cat litter is a low cost, versatile product that can clean up and deodorize your home.

Here are just a few practical, frugal ideas:

Put cat litter in old pantyhose or socks, and put them inside gym bags, sleeping bags and tents. They will stay odorless, dry and free of mold. You can also place the socks in chests, trunks or boxes to freshen books and other stored items.

Use kitty litter to soak up fresh spills, including oil in the driveway or carport. Simply put a generous layer of litter over the affected area and wait a few minutes for the mess to be absorbed.

Scented cat litter, placed in a small container, is great for deodorizing refrigerators and closets. Remember to change it regularly, as you would baking soda.

Place kitty litter in the bottom of an ashtray. It absorbs smoky odors and puts out the ashes quickly.

Cat litter in the bottom of garbage pails is a good way to keep them deodorized, and free of sticky spills.

Do you have a koi pond? Use cat litter to clean up an algae problem. Use one pound of litter per 2,000 gallons of pond water. The bentonite in the litter kills the algae. Your pond may appear muddy at first, but the water will clear after a day or two.


Irene Helen Zundel is a freelance writer, educator and mother, and an expert in child development, home schooling and creative parenting and home making.
Visit her online at http://www.irenehelenzundel.com

Sunday, August 24, 2008

Cost-cutting Uses for Club Soda


Club soda is a versatile, inexpensive product that can be used in many areas in a frugal household.

Here are a few of them:

Do you have lackluster houseplants? Water them with old club soda that has gone flat. The minerals are beneficial to the health and vitality of your potted friends!

Are you tired of paying high prices for soft drinks, and don’t like the obesity causing high fructose corn syrup they contain? Make your own soft drinks with club soda, mixed with the fruit juice of your choice. You can be creative with the flavor combinations and not get bored drinking the same old sodas.

If you have an upset stomach, drink a little club soda. It will take away that queasy feeling.

Club soda is great for removing stains from fabrics. Dab a little on a spot on a piece of clothing and watch it disappear! You can remove wine stains from carpet with it as well.

Do you need to degrease your car windshield? Spray it with club soda and wipe it down.

Around the house, club soda is a great cleaning product. Spray it on porcelain and stainless steel, and use it to wipe down your kitchen counter tops.

Have you ever cooked with club soda? Substitute club soda for the liquid in your favorite pancake or waffle recipe, and see how light and fluffy they turn out!

Do you have nuts and bolts that are rusty and hard to remove? Pour a little club soda on them. The bubbles will dissolve the rust.

Has your blond hair turned green from the chlorine in your swimming pool? No worries! Rinse your hair with club soda and your normal color will return.


Irene Helen Zundel is a freelance writer, educator and mother, and an expert in child development, home schooling and creative parenting and home making.
Visit her online at http://www.irenehelenzundel.com

Reblog this post [with Zemanta]

Wednesday, August 20, 2008

Practical Frugal Uses for VO5 Hair Conditioner

My grandmother was a bottle blonde. Weekly she would torture her hair by combing a bottle of peroxide through it. I thought for sure she would have dry, brittle hair, but hers was soft and shiny, and oh so touchable!

Her secret? Alberto VO5 leave-in, gel hair conditioner.

It is still available in drug stores today, and I have discovered it has lots of practical uses.

Here are just a few:

Make cleaning your hands after painting or doing greasy jobs easy. Just rub some VO5 on them before you start working, and wash your hands when you are done. Paint and grease comes right off!

Do you need to get a ring off that is stuck on your finger? Rub VO5 on it and then hold your hand over your head to let the blood drain away. The ring will slide offeasily.

Do you have dry, chapped skin? Use VO5 as a heavy- duty moisturizer.

VO5 can also be used to condition leather, and it is far less expensive than the mink oil that is usually recommended. Rubbing it on shoes can protect them from winter salt and ice, and prevent them from squeaking as well.

You can detangle your pet’s coat with VO5, and protect their feet outdoors, by rubbing a little on their paw pads!

Do you have a horse? Use VO5 to shine their hooves, detangle their mane and tail, and condition the leather saddle you ride on.

VO5 is also a great lubricant. Use it to keep medicine cabinet doors sliding easily on their tracks, to make pipe joints fit together easily, to keep hinges from squeaking, prevent dresser drawers from sticking, and make refrigerator racks slide easily.

Do you have wood paneling in your house? Rub it into wood to keep it from drying out. You can also use it to cover scratches. Apply a little to the damaged area and just buff the scratches out.

Are your kids sports enthusiasts? VO5 can be used to lubricate bicycle chains and keep skateboards and roller skates gliding smoothly.

You can prevent nuts and bolts from rusting together by putting a thin coat of VO5 on them before screwing them together. A thin coating applied to tools keeps them rust-free as well.


Irene Helen Zundel is a freelance writer, educator and mother, and an expert in child development, home schooling and creative parenting and home making.
Visit her online at http://www.irenehelenzundel.com

Frugal Uses for Dental Floss

Dental floss isn’t just for cleaning between your teeth! It has lots of other practical uses, both indoors and out.

In the kitchen, you can use waxed dental floss to cut perfect slices of cake, or cheese, and to lift cookies off the baking sheet. It also is a good choice for trussing a bird before baking, or sewing the bird’s cavity shut so the stuffing doesn’t fall out.

Do you go camping? Bring along dental floss in case you need to repair your tent or replace a broken shoelace. It is much stronger than thread or string.

If you have a heavy winter coat with big buttons, reattach them with dental floss. It prevents them from falling off.

Dental floss is also great for repairing torn screen doors or the mesh on playpens.

Little hands find dental floss easy to use when making necklaces or stringing beads. They slide right on the string!


Irene Helen Zundel is a freelance writer, educator and mother, and an expert in child development, home schooling and creative parenting and home making.
Visit her online at http://www.irenehelenzundel.com

Uses for Clear Nail Polish


When I was a young girl, I used clear nail polish to strengthen my nails, and to make them look pretty. Back then, I didn’t really think of other uses for it. But now, as a frugal middle-aged mom, I can appreciate its versatility as a cheap fix for a variety of problems.

Here are just a few creative uses for clear nail polish:

Paint over the center of a button with clear polish. It reinforces the thread, and prevents them from unraveling, and causing the button to fall off.

Dab it on screws, or on the bottom of a can of shaving cream. It prevents rust from forming.

Apply it to a small run that is starting on your pantyhose. It will keep the fabric from ripping further.

Laminate small objects with it, like the label of a pill bottle or the front of an ID card. It keeps the print clear and easy to read.

Tighten loose knobs on doors and closets. Simply brush clear nail polish on the threads of the screw and reinsert it in the hole. When the polish dries, there will be a nice tight fit.

Use clear polish to fix small dings, dents and holes in wood floors, paneling, car windshields or windows. Just fill the hole with polish and let it dry.


Irene Helen Zundel is a freelance writer, educator and mother, and an expert in child development, home schooling and creative parenting and home making.
Visit her online at http://www.irenehelenzundel.com

Frugal Uses for Bananas and their Peels in your Garden


Bananas are delicious and nutritious for humans. But did you know they are wonderfully healthy for plants as well?

Bananas and their peels are rich in potassium and phosphorous, two essential nutrients for healthy plants. Dry the peels on a screen, and then grind them up in your food processor or blender. This makes a high-quality mulch for seedlings and new plants. You can use larger pieces of cut, dried banana skins around the base of your older plants as well.

One bonus of adding banana peels to your garden is that those pesky little aphids hate them! Simply put dried or cut up peels around the base of affected plants, about an inch or two under the soil, and watch them move on to your neighbor’s vegetable patch!

The rotted fruit of the banana, and the peels are both good additions to your compost pile. Just be sure to bury the fruit deep in the middle. Otherwise you may attract skunks, raccoons and other night-visitors looking for a midnight snack.


Do you want to attract birds and butterflies to your yard? Put over-ripe bananas, and other sweet fruits such as mangoes and melons on a raised platform in your yard. Your winged friends will make a bee-line for it! Some nature enthusiasts recommend punching some holes in the bananas and filling them with sugar water from a hummingbird feeder, or some sports drink. It makes it easier for the butterflies to feed on the fruit.

Bananas are good for houseplants as well. Instead of misting the leaves with water to clean them, rub the leaves with the inside of a banana peel. It gives the leaves a nice shine.


Irene Helen Zundel is a freelance writer, educator and mother, and an expert in child development, home schooling and creative parenting and home making.
Visit her online at http://www.irenehelenzundel.com

Reblog this post [with Zemanta]

Tuesday, August 19, 2008

Peroxide: Versatile and Frugal Uses for your Home

Do you want to clean, freshen, and kill bacteria and fungus around your home for just pennies per use? Then get out that bottle of hydrogen peroxide.

Here are just a few of its wonderful, frugal uses:

In the Laundry room:
Use one cup of peroxide in your wash,instead of bleach, to whiten your clothes.

For those of you with a green thumb:
Put one ounce of peroxide in one ounce of water, and use it to mist your plants, to keep the leaves healthy.

You can also use it to sprout seeds. Just add one ounce of peroxide to one pint of water. Add the same amount of peroxide each time you rinse the seeds.

In the kitchen:
Use peroxide to wipe down all of your surfaces. It sanitizes everything beautifully!

Peroxide also is an effective pesticide remover, so use it when cleaning you fruits and vegetables. Just wash your fresh produce in a sink of cold water with a little salt and 1/4 cup of peroxide. It prolongs the freshness of your food.

Peroxide is also good for washing chicken, and other meats. Use a little salt and peroxide in chilled water. It kills any bacteria and viruses that may be lurking!

In the bathroom:
Keep a spray bottle with half water/half peroxide handy for spraying down your shower and bathtub. It kills germs and keeps them nice and clean.

You can also use peroxide on your toothbrush, to kill bacteria, and to make a cheap tooth whitener. Just swish a teaspoon of peroxide around in your mouth every day, after each time you brush your teeth.

Straight peroxide on a cotton ball is a great acne treatment. Just clean your face with it 3 or 4 times a day and watch those pimples disappear!


Irene Helen Zundel is a freelance writer, educator and mother, and an expert in child development, home schooling and creative parenting and home making.
Visit her online at http://www.irenehelenzundel.com</span>

Reblog this post [with Zemanta]

Sunday, August 17, 2008

Frugal Gardening Tips


Are you an avid gardener? Great! Homegrown food is the freshest and most nutritious.

Gardening supplies can be a little expensive, so here are some real cost cutting suggestions:

Don't use expensive black plastic bags between the rows of your garden to cut down on weeds. Use old newspapers instead. You can also shred them to make an inexpensive mulch and use them to cover plants if frost weather is in the forecast.

If you pick tomatoes when they are green and they need to ripen a bit, just wrap them in a piece of newspaper and store them in a cool, dark place for a few days.

Are you transporting fresh flowers? Wrap them in damp newspaper so they don't wilt.

Make a mat from newspapers to kneel on while you are gardening. It is more comfortable to work that way, and your pants won't get soiled.

Don't buy little pots to plant seedlings, use eggshells instead! When you are ready to plant the seedlings, just crush the shells and leave them in the soil. They provide an extra source of calcium, which is good for plants. Tomato plants especially love calcium enriched soil. It prevents blossom end rot.

Old coffee grounds are also good for enriching soil.

Do you want to keep slugs and snails out of your garden? Put a barrier of crushed egg shells around the perimeter of your vegetable patch. They don't like the sharp edges.

Are ants and cutworms a problem for you? surround your garden with a ring of old coffee grounds to keep them away.

To get rid of anthills, mix one pound of old coffee grounds and one quart of warm water, and spray it on the trouble spots in your yard.


Irene Helen Zundel is a freelance writer, educator and mother, and an expert in child development, home schooling and creative parenting and home making.
Visit her online at http://www.irenehelenzundel.com


Enhanced by Zemanta

11 Fantastic Frugal Uses for Aluminum Foil

Household aluminium foilImage via Wikipedia

Aluminum foil is not just for cooking food, or wrapping up left overs. It has lots of great uses!

For example:

You can use a crumpled up ball of foil in your clothes dryer to prevent static cling.

If you need to iron a delicate fabric, just line the ironing board with a piece of foil and put the garment on top of it. Hold your iron about three inches above the fabric and press down on the steam button. the wrinkles will come right out!

Are your scissors dull? Cut through a stack of foil that is several sheets thick, and they will become sharp again.

If you need to clean a crust barbecue grill, or a pan with dried on food, use a ball of aluminum foil instead of a wire brush or a steel wool pad.

Are you painting your house? Cover your hardware and doorknobs with foil to keep dripping paint off them.

Aluminum foil rolled into a cone shape makes a quick and easy funnel, or pastry bag.

Foil placed on the crust of a pie, half-way through the baking process, prevents the crust from getting too brown. You can use a metal pin or clip to hold the foil in place.

Are you out of wrapping paper? Use aluminum foil! Add pretty glitter, stickers, ribbons etc. for an additional decorative touch.

Do you hate to polish silver? No problem! Line a pan with aluminum foil, fill it with cold water, and add two teaspoons of salt. Let your silverware soak for a few minutes and then just dry it off.

To prevent future tarnishing, wrap you good silver tightly in saran wrap, being careful to get as much air out as possible. Then wrap the pieces again in aluminum foil and seal the ends.

Bad TV reception? It could be from stacking your VCR on top of, or under your TV. Simply slip a piece of foil between the two, and watch the signal clear right up!


Irene Helen Zundel is a freelance writer, educator and mother, and an expert in child development, home schooling and creative parenting and home making.
Visit her online at http://www.irenehelenzundel.com

Reblog this post [with Zemanta]

Saturday, August 16, 2008

Creating Frugal Halloween Costumes


A shopping trip to buy Halloween costumes for your kids can be a real shock. The prices are high, the quality is not so hot, and they can hardly be used for more than one year.

A better alternative is to make your own costumes at home. For some real family fun, let the kids do most of the work themselves.

For example:

Do you have an old sheet? Make a ghost costume by cutting out some eye holes. Then give the kids some permanent markers of various colors, and let them draw all the creepy-crawly, scary, graveyard looking stuff they want.

How about dressing up like a hobo? I did that when I was a little girl. My mom tucked my long golden curls up under a railroad hat, and made a beard out of maple syrup and coffee grounds. She took a pair of my brothers pants that were too big on me, and tied them around my waist with a piece of rope. She added a big shirt, buttoned crooked, mismatched socks, over-sized beat up shoes, stuffed in the toes so I could walk, and a knapsack made from a tree branch, and a handkerchief stuffed with clothes.

An angel costume is another idea that is easy on the budget. Again, use an old sheet for the robe. Decorate it with markers and glitter,to make it pretty. Fashion a halo from a wire hanger and aluminum foil. Use cardboard to cut out wings, and cover them with foil too.

Are your kids natural born clowns? Use a variety of mismatched clothes, both too large and too small to create a comical looking outfit. Get creative with your make up kit to make an outlandish face. Tease and gel their hair into a goofy style. And then splurge and spend a dollar on a clown nose, or make one from a small red rubber ball, if you have one around the house. Do you have a straw hat you use for gardening? Decorate it with plastic flowers, feathers, or anything else you have lying around home. The crazier the better!

If you have any aspiring rock stars in the family, try dressing your kids all in black. Spike their hair with colored hair glue to make it look funky. Borrow your dog's collar for a necklace, and use a bandana for their head gear. Any spiky jewelry you have will add a nice touch as well.

These costumes are cheap, fun to put together, and can be memorable because the kids got to help and add their own creative input. Why not get out the family video camera and record the mayhem for posterity? :-)


Irene Helen Zundel is a freelance writer, educator and mother, and an expert in child development, home schooling and creative parenting and home making.
Visit her online at http://www.irenehelenzundel.com

Thursday, August 7, 2008

Practical Frugal Uses for Fabric Softener Sheets

Fabric Softener SheetImage by G3Cube via Flickr

Those lovely smelling fabric softener sheets, that prevent static cling, have multiple uses, both indoors and out. They can be a cheap alternative to other products, and they are small and easy to use.

Before you leave the laundry room, wipe out the inside of the dryer, the lint trap and the outside of your washing machine, with a new dryer sheet. Clean up any spilled detergent with it. It will keep the area dust and lint free, and smelling fresh.

Use a sheet to de-bug your car's windshield and exterior. Wet the area first, and wipe it down with a dryer sheet. It cleans off squashed insects like a charm!

Put some dryer sheets under your lawn chair, on your beach towel, or hanging out of your shirt pocket while gardening outdoors. They act as a bug repellent.

Need to clean a tough cooking mess? Put a dryer sheet in the bottom of a gritty pot or pan and cover it with water. Let it soak for a couple of hours, then clean. Burnt and stuck on foods will come right off.

You can also use the sheets to remove latex paint from paintbrushes. Stick a dryer sheet in a pan of warm water and add the paintbrushes. Let them soak for a minute or two. The paint will come right off.

Put dryer sheets inside your shoes, underneath car seats, in air conditioning vents, dirty clothes hampers, or anywhere else you need to freshen up. They will leave a nice clean scent.

Carry them in your purse for a beauty touch up! If your pantyhose, clothes or hair are suffering from static cling, wipe down the affected area. The static cling will be gone in seconds and you will smell fresh.

Have a wet dog or cat? Wipe down their fur with a dryer sheet to get rid of that funky fur smell!

You can also use dryer sheets to clean your combs and hairbrushes. Add two dryer sheets to a container of warm water and let your brushes soak for a couple of hours. Rinse them after your remove them. You will notice that built up hair products and hairspray will be gone and the bristles will smell nice too!


Irene Helen Zundel is a freelance writer, educator and mother, and an expert in child development, home schooling and creative parenting and home making.
Visit her online at http://www.irenehelenzundel.com

Reblog this post [with Zemanta]

Monday, August 4, 2008

Creative Uses for Dryer Lint

Don't throw out that fuzz from your dryer's lint screen! You can turn it into many practical and beautiful items.

For example, why not give lint of various colors to your children for art projects? They can use it for anything that needs a soft and fluffy look, like Santa's beard or a snowman on a homemade Christmas card, fluffy clouds on a picture, or the pom-pom buttons on a clown's suit.

If you sew, use it for stuffing. I saved up my lint for several months, and put it inside cloth ornaments I was sewing for my Christmas tree. It sure beat buying that expensive pillow stuffing at the craft store, and looked every bit as nice.

Why not make homemade paper with it? You can use it for scrapbook pages, wrapping small gifts, or make a stationery set with a nice pen for a gift.

Here is the recipe for turning lint into paper:

Make a concoction called "slurry" by mixing torn scraps of paper, dryer lint and water together in a blender. Pour it onto a paper-making frame that is placed in a pan of water. Carefully lift the frame up, flip the paper out and let it dry.

You can also use dryer lint to make clay:

Mix together 2 cups of firmly packed lint, 1/3 of a cup of warm water, 1 tablespoon of clear dish washing liquid, and 6 tablespoons of white glue. If you want to add color or sparkle, mix in a few drops of food coloring or glitter. Mix and knead evenly into a nice pliable clay.

Animals also like dryer lint! Give it to your hamster for bedding. Or leave it outside for birds to line their nests with it. This works best in desert climates, as lint can absorb a lot of moisture, and might waterlog the nest in cold or rainy climates.

Keep cold air from coming in the house under your doors. Simply stuff dryer lint into old tube socks, and use it as a draft stopper.

Put lint inside toilet paper rolls and use it for a fire starter when camping, or for your home fireplace. Remember that lint is very flammable, so store it carefully. Try putting the fire-starters in a coffee can. It will keep the lint dry while camping outdoors.

Finally, use lint as a packing material, instead of buying those expensive padded envelopes at the post office.


Irene Helen Zundel is a freelance writer, educator and mother, and an expert in child development, home schooling and creative parenting and home making.
Visit her online at http://www.irenehelenzundel.com

Friday, August 1, 2008

Creative Uses for Old Pantyhose

If you are like me, you hate to see a pair of pantyhose gets runs. They are so expensive for a good pair, and they just don't seem to last very long! Rather than throw them out, I have found numerous second uses for them.

For example, use the waistband as you would a giant rubber band or piece of rope.
Put it around your trash can, to keep the liner from falling in. Use it to tie together stacks of newspapers, before you haul them to the trash. In the garden, use them to tie your tomato plants to the stakes.

In the past, I've used cut up pieces of pantyhose for craft stuffing. It worked wonderfully filling cloth Christmas tree ornaments I was sewing for the tree.

You can use the foot part for several things. Make a pet toy by stuffing it with old cloth, knee high stockings with runs, or even dryer lint, and fold the nylon back over itself several times. If needed, sew the end closed.

You can also fill the feet with old soap pieces, potpourri or herbs and spices to make air fresheners. Put them in drawers, closets, and in cabinets that get musty smelling,

Put garlic and onions in them and hang them from a hook in the kitchen. This allows air to circulate freely around them, and helps keep them fresh.

The legs can be used as a filter to cover the end of a shop vac, or pool skimmer. It keeps finer pieces of dirt and debris from clogging things up.

Those are just a few ideas to get you started. How many creative uses can you find?


Irene Helen Zundel is a freelance writer, educator and mother, and an expert in child development, home schooling and creative parenting and home making.
Visit her online at http://www.irenehelenzundel.com

Wednesday, July 30, 2008

Slash Grocery Costs with These Simple Tips


These days, a trip to the grocery store can be a sobering experience. Ever increasing food costs are straining the budgets of countless families.

Consider these facts:

  • According to U.S. Department of Labor, the average American family of four spends $709 a month, or $8,508 per year, on groceries. (That doesn't include eating in restaurants.)
  • According to the U.S. Department of Agriculture,food prices climbed 4 percent in 2007, the biggest annual increase since 1990, and prices are projected to rise 4.5 percent to 5.5 percent this year.
  • In a recent USA Today/Gallup Poll of 1,016 adults, 46 percent said the higher cost of food is creating a financial hardship.
So, what can families do to keep ample food on the table, without emptying their wallets?

First, kick the convenience food habit. That simple strategy can shave a whopping 25% off your food costs! Grate your own cheese, make your own salad dressings and gravies, prepare your own coleslaw and salad mixtures. Make your own fresh, preservative free, vitamin rich baby foods in a food processor.

Next, stop wasting food! According to a study from the University of Arizona, Americans throw out 25% of the produce they buy each year, which amounts to about 470 pounds! Try buying vegetable bin liners that increase the shelf life of your food, or buy storage containers with a good locking seal, to prevent oxidation and absorption of food odors.

Shop with a strategy. Compile a list, and only buy what is on it. Clip coupons. Take advantage of store promotions. Buy generic when possible. Only shop when there are 10 or more items you need to buy. Avoid impulse buying like the devil avoids holy water!

According to a study by the non-profit Marketing Science Institute, shoppers who make quick trips to the store purchase 54 percent more than they had planned.


Be creative with your menu planning. Try cooking once but eating twice. Tonight's roasted chicken leftovers can become tomorrow's soup at lunch. The blueberries that graced this morning's cereal can be made into muffins or pancakes.

Spend some time doing prep work after you unpack your groceries. Chop your vegetables ahead of time. Put half in a storage container in the refrigerator for this week's cooking. Put the other half in a freezer storage bag for future use. It cuts down your cooking time to have foods already cleaned, cut and sorted by recipe ingredients. It also prevents food from spoiling, and ending up in the garbage can.

Pay attention to the price per ounce comparisons. Whenever possible, buy in bulk.

Finally, eat in restaurants less. When you do go, bring coupons, get the "early bird" specials, free birthday desserts, senior citizen discounts or "kids eat free" deals.


Irene Helen Zundel is a freelance writer, educator and mother, and an expert in child development, home schooling and creative parenting and home making.
Visit her online at http://www.irenehelenzundel.com

Tuesday, July 29, 2008

Make Scentsational Gifts with Dried Flowers


Make Scentsational Gifts with Dried Flowers

Flowers are some of nature’s finest artwork. Their soft beauty, wonderful aromas, and vivid splashes of eye-catching color can cheer any living space and bring contentment to the soul.

It is very easy to preserve the breath-taking beauty of fresh flowers, and to turn them into lasting, hand-crafted gifts. Try using blooms from your garden or wildflowers you gather on a nature walk to make lovely, scented soaps or potpourri.

Following you will find three easy soap recipes, and two lovely potpourri mixtures to get you started. From there, using your natural creativity and imagination, you can come up with many more ideas, I am sure!

Why not make it a family project? Take a nice pair of garden shears and a wicker gathering basket with you on a walk. Cut and dry the flowers using the easy instructions below. And after the recipes are made, enlist the help of the kids to add lace, ribbons, gift tags, and other decorative touches.

Now, let the fun begin!


Flower drying tips:

• Select flowers that are just beginning to open. (Flowers cut at a later stage may drop their petals in the drying process).

• Cut them in the late morning, after the dew has dried, or on a dry day.

• Bundle 8-10 flowers together and secure the end of the stems with rubber bands.

• Insert an unraveled paper clip or florist wire through the rubber band and make a hook.

• Hang the flower bundle upside down from a piece of lattice, or on a peg or a hook, out of direct sunlight.

• Flowers are dry when they feel crisp to the touch. The drying time varies, depending on temperature and kind of flowers, but generally are ready in 1-3 weeks.


Some flowers that dry well are:

African marigold, cornflower, delphinium, lavender, larkspur, pompon dahlia, rose and yarrow.


To make dried flower hand soaps:

Using a coarse grater, make shavings from 12 ounces of a gentle unscented soap.

Sprinkle the soap shavings with about 1/4 cup of warm water. Stir until moistened, then allow the mixture to sit for about 10 minutes so the soap softens.

Add the essential oils, crushed dried flowers, and/or ground spices.

(HINT: Measure the dried flowers first, and then crush them gently in a blender or food processor. Don’t add too many flowers, as it will cause the soap to crumble when it dries).

Using your hands, mix the scented oil and flowers or spices into the soap mixture until evenly distributed. Form the soap mixture into small balls.

Squeeze the ball firmly to remove air pockets, so the soap won’t fall apart when dry.

Roll each ball in leftover soap shavings and crushed flowers or spices.

Set balls on waxed paper to dry for at least a week. Squeeze them every other day to keep them round while drying.
When dry, wrap them in decorative cellophane to help them retain their scent.

Yield: Approximately six soaps that can be stored up to one year.

Here are three soap recipes you can try:

• Lavender Soap - add 1/2 cup dried, crushed, lavender flowers and 15 drops lavender oil.

• Rose Petal Soap - use 1/4 cup warmed rose water in place of the water mentioned earlier. Add 1/2 cup dried, crushed, rose petals and 1 teaspoon rose oil.

• Holiday Soap - add 2 teaspoons grated orange peel, 2 teaspoons ground cinnamon, 1/2 teaspoon ground ginger and 15 drops cinnamon oil.

(Note: If the soaps lose their scent over time, freshen them by adding an additional drop or two of essential oil).

Here are two nicely scented potpourri recipes you can make:

Rose Potpourri

2 cups dried rose petals and leaves
1/2 tsp cinnamon
1/2 tsp cloves
1/2 tsp allspice
1 and 1/2 tsps orris root
6 drops rose oil
a 1 quart container

Combine the rose petals and leaves, along with the cinnamon, cloves and allspice. Mix well. Drop the rose oil directly on the orris root, and add it to the mixture. Age it three weeks or longer, shaking daily.

Cottage Garden Mix

1 cup dried lavender flowers
1 cup dried rose petals
1 cup dried pinks (Dianthus)
1 cup dried scented geranium leaves
1 tablespoon ground cinnamon
2 teaspoons ground allspice
1 teaspoon dried grated lemon peel
2 tablespoons orris-root powder
3 drops rose oil
3 drops geranium oil

Mix ingredients together in a covered container, and set aside for six weeks. Stir daily to distribute the fragrances.


Sources:

The Homemakers Journal
http://www.homemakersjournal.com


Birds and Blooms, June/July 1997

The Essential Aromatherapy Book
Carole McGilvery and Jimi Reed
Lorenz Books, 1995


Irene Helen Zundel is a freelance writer, educator and mother, and an expert in child development, home schooling and creative parenting and home making.
Visit her online at http://www.irenehelenzundel.com

Reblog this post [with Zemanta]

Homemade Aromatherapy Products and Remedies for Babies


Homemade Aromatherapy Products and Remedies for Babies

Babies! Their breath-taking perfection and fragile beauty stirs every mother’s heart. There isn’t anything a mom wouldn’t do to keep her baby healthy and happy.

Unfortunately, the baby products and remedies in today’s drug stores and super markets are filled with dyes, chemical irritants, perfumes and preservatives. These ingredients can harm your child’s tender skin, and perhaps irritate their delicate nasal passages and lungs.

And boy are they pricey!

If you want to pamper, soothe and heal your baby naturally, without breaking your family budget, try the ancient magic of aromatherapy.

Following you will find simple recipes for baby products you use every day, and natural remedies for diaper rash, teething pain and general fussiness when your child is overly tired.

Try the recipes I have suggested, or create your own using the included list of essential oils and their healing properties. But please Mom, also notice and heed the included warnings as well!


Some general precautions:

Don’t use essential oils with children under three months of age.

When making products for babies, use half the amount of essential oil you would use for an adult.

For children 3 months to 2 years of age, use 5 drops of essential oil to every ounce (approximately 2 tablespoons) of carrier oil.

For children two years and older, you may increase the amount to 10 drops of essential oil for each ounce of carrier oil used.

Do NOT use mineral oil! This clogs the pores of your baby’s skin.


Oils safe for babies:

Chamomile
For colic, teething pain, and calming an overly tired child

Eucalyptus
For respiratory conditions, to lower fever, and to stop the itch of chicken pox

Geranium
For lifting spirits and refreshing the atmosphere

Lavender
For colic and thrush

Lemon Eucalyptus
For the treatment of cradle cap

Mandarin
To induce mild relaxation

Neroli
For deeper relaxation

Rose
For soothing dry or irritated skin

Sweet Orange
For calming a child and settling digestive upsets

Tea Tree
For burns. scrapes, cuts, general wound healing and the treatment of thrush


For children two years or older:

Ginger
For nausea and diarrhea

Lemon
For insect bites

Peppermint
For fever, colds, and nausea

Rosemary
A good decongestant

Clary Sage
A relaxant

Tangerine
For calming upset stomachs


Here are a few recipes you can try for cleaning baby’s bottom, soothing diaper rash, eliminating teething pain, soothing irritated skin, and making your child calm and relaxed.


Soothing Baby Massage Oil

4 oz of oil (try sunflower, almond, safflower or apricot)
5 drops of lavender essential oil
5 drops of sweet orange essential oil

Blend together well in a plastic bottle. Cap tightly.

As an alternative, you can use 10 drops of rose essential oil instead.
This has a pleasant fragrance and is great for soothing irritated skin.

NOTE: Not for babies! Use rose essential oil on children two years of age or older.


Teething Pain Gel

1 oz vegetable oil
1 to 2 drops of clove essential oil

Mix together and rub gently on your baby’s gums.

For a sweeter tasting gel, substitute vegetable glycerin instead.


Natural Baby Cleansing Wipes

1/8 cup of vegetable oil
1/8 cup of baby shampoo
1 and ½ to 2 cups of distilled water
8 drops of lavender essential oil
5 drops of tea tree oil

Cut a roll of paper towels in half. Remove the inner cardboard core.

Put the towels in an empty plastic diaper wipe container.

Pour the liquid over the towels and let it soak in.

Remove a towel from the center of the roll, and feed it into the pull slot in the top of the container for easy dispensing.

The lavender oil has anti-bacterial properties, and a soothing fragrance that calms your baby. The tea tree oil discourages the growth of mold.


Diaper Rash Remedy

Add one drop of chamomile oil to a dab of diaper rash ointment (generally sold in the drug store as zinc ointment with vitamins A and D).

Blend well and rub in the affected area.


Teething Relief

Mix 1 drop of chamomile oil in 1/8 cup of ice cold water.

Dip a cotton ball into the water, squeezing out the excess.

Rub the chamomile ice water across the baby’s sore gums.


Children's Calming Mist

Add to four ounces of water:

10 drops neroli oil
10 drops chamomile oil
10 drops mandarin oil
10 drops sweet orange oil:

Mist with a spray bottle into your child‘s play room.


For more information:

Natural Baby Care: Pure and Soothing Recipes and Techniques for Mothers and Babies (Natural Health and Beauty Series), by Colleen Dodt
Paperback: 144 pages
Storey Books; (April 1997)


Aromatherapy for Women and Children: Pregnancy and Childbirth
by Jane Dye
Paperback: 244 pages
The C.W. Daniel Company Ltd; (January 1993)


Aromatherapy for the Healthy Child: More Than 300 Natural, Non-Toxic, and Fragrant Essential Oil Blends
by Valerie Ann Worwood
Paperback: 320 pages
New World Library; (April 2000)


Herbs of Grace website
http://www.herbsofgrace.com


Stony Mountain Botanicals
http://www.wildroots.com


Driftwood Health
http://www.pureproducts.net/


Irene Helen Zundel is a freelance writer, educator and mother, and an expert in child development, home schooling and creative parenting and home making.
Visit her online at http://www.irenehelenzundel.com

Reblog this post [with Zemanta]

Hair Smoothies: The Frugal Fix for Frazzled Hair


Hair Smoothies: The Frugal Fix for Frazzled Hair

I remember Grandma, and boy did she have beautiful hair!

As a woman who lived through the Great Depression and two World Wars, she had to learn to primp and preen on a shoestring. No expensive shampoos and conditioners. No pricey dye jobs. No weekly trips to the beauty parlor for a wash and set.

She merely whipped up a concoction or two right in her kitchen, to give her hair body, volume and shine, and to clobber the frizzies and split ends.

I have compiled several old time recipes, modernized by using that wonderful kitchen contraption, the blender! They use dairy products, fruits, eggs, honey, vanilla extract, fresh mint, and other healthy and fragrant ingredients.

They can be fixed in a snap, and cost just pennies per use! Why not give them a try?

To thicken and moisturize your hair, and give it a healthy shine:

Puree in your blender:

1 egg yolk
1/4 cup coconut oil
1/4 cup whole milk
4 tbsp. aloe vera gel and
4 fresh strawberries

Apply the mixture to damp, towel-dried hair. For best results, start at the roots and comb through to the end of the hair.

Place a shower cap or warm towel over your hair for 15 to 30 minutes.

Shampoo and rinse until the water runs clear.

To deep condition your hair and repair split ends:

Blend together:

1 tbsp. plain yogurt
1 tsp. wheat germ oil
1/8 tsp. lecithin granules
Squirt of honey
1 tsp. sweetened condensed milk
1/2 banana
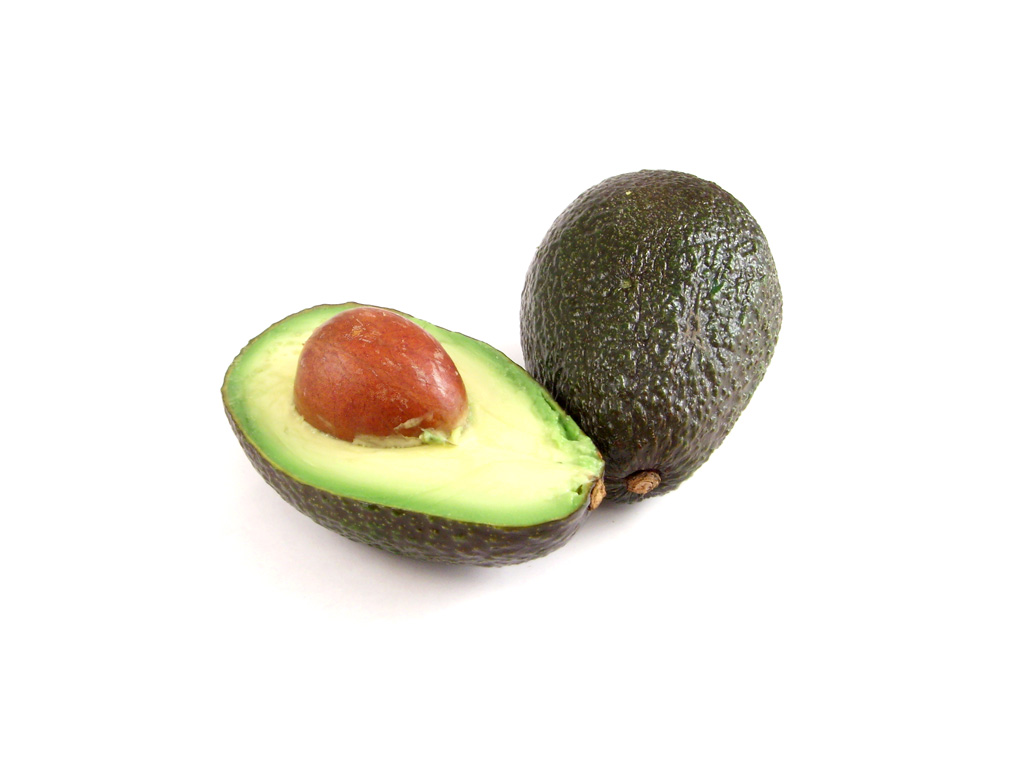
1/4 of a peeled avocado

Brush the mixture on your hair in downward direction .

Wrap your scalp in plastic bag for 45 minutes.

Rinse thoroughly.

To add shine to your hair:

Blend together:

1 peeled red apple,
2 tablespoons baking soda, and
1/3 cup seltzer water

Apply to damp hair.

Leave on for 15 minutes.

Shampoo as usual.

To add volume:

Combine in your blender:

2 drops vanilla extract,
1 teaspoon chopped fresh mint and
1 cup plain yogurt

Work the mixture into damp hair.

Leave on for five minutes.

Rinse well.

To fight the frizzies:

Blend together:

1 tangerine
1 grapefruit
enough cornstarch to thicken.

Work through hair.

Leave on for 5 minutes.

Rinse well.


For more great hair tips, visit these websites:

Robert Hallowell, The Kitchen Beautician
and celebrity hair stylist

http://www.thekitchenbeautician.com/frames.html

Longhairlovers.com
http://www.longhairlovers.com/press.html

Great Day America
http://greatdayamerica.com/style/beauty/hairsmoothie.shtml


Irene Helen Zundel is a freelance writer, educator and mother, and an expert in child development, home schooling and creative parenting and home making.
Visit her online at http://www.irenehelenzundel.com

21 Frugal Uses for Coffee Grounds, Filters and Cans


21 Frugal Uses for Coffee Grounds, Filters and Cans

Are you a big coffee drinker? If so, you probably toss a small mountain of grounds, filters and cans into the garbage every week…and into your city’s overflowing landfills as well.

Instead of throwing out the by products of your coffee pot, why not put them to practical use instead? Coffee grounds, filters and cans have scores of uses in the home, garden, workshop and campgrounds.

I have listed twenty one recycling tips to get you started. I bet you can think of dozens more! Why not give them a try?

Coffee grounds:

In the garden, they are great for repelling pests. To keep ants and cutworms away from your vegetables, surround your garden with a ring of coffee grounds. To rid yourself of ant hills, mix one pound of coffee grounds with one quart of hot water, and douse the trouble spots on your lawn with it.

Dump coffee grounds in your garden and flower beds to enrich the soil.

Do you want to start a worm farm? Mix together horse manure and coffee grounds to make a soil your wriggling friends will love.

Houseplants love coffee! Use the grounds to top off your potted plants, or mix them in with your potting soil. If you have left over coffee in your pot (without cream and sugar) use it to occasionally water your plants.

Use steeped coffee grounds and a cotton ball to touch up scratches on your furniture.

Dry coffee grounds thoroughly on a cookie sheet in your oven. Then stuff the grounds into old pieces of nylon stockings and tie off the ends. Put the stockings in your refrigerator, under kitchen sinks, and in musty smelling closets. The coffee is a great natural deodorizer!

Do you want to highlight your brown or black hair? Rinse it with a cooled pot of brewed coffee.


Coffee filters:

Line a planter with coffee filters. It prevents soil from leaking out when you water your plants.

Put filters between your good china dishes to prevent scratches.

Clean your glasses, mirrors, windows and computer screens with coffee filters. They are lint free!

Use coffee filters to recycle your cooking oil. Simply drain it through a filter lined sieve.

Ball up a coffee filter and use it to apply shoe polish.

Polish crystal and glassware with coffee filters.

Use coffee filters to cover dishes in the microwave. It will eliminate splatters and make clean up easier.


Coffee cans:

Fill a coffee can with charcoal briquettes, replace the plastic lid, and punch some holes in it. Place the can in closets and under kitchen and bathroom cabinets to absorb excess moisture.

Store cat litter in a coffee can in the trunk of your car. Use the litter for traction under your wheels when your car is stuck in mud, ice, or snow.

While camping, store your toilet paper in a coffee can. It will keep it waterproof.

Coffee cans are great for transporting live fishing bait. Fill the can with moist soil and worms. Cover with the can’s plastic lid a punch a few small air holes in it.

Use small coffee cans to protect young tomato plants. Cut the top and bottom off each can. Put one can around each plant and step on the end to sink it into the ground. Remove the cans when the plants are a few weeks old.

Grow better melons, with the help of old coffee cans. Sink coffee cans into the soil, bottom ends up. Place the melons on top of each can. The metal attracts heat which quickens ripening and repels insects.

Prevent paintbrush bristles from bending while you soak them in solvents. Fill the can with solvent and replace the plastic lid. Cut a slit in the lid, and push the paintbrush through the top. The snug fit keeps the paintbrush upright while the bristles rest in the liquid.


For more great ideas, try these resources:

Yankee Home Hints
Earl Proulx
St. Martin’s Press, 1993

Wacky Uses
http://www.wackyuses.com/maxwell.html

Cocoajava.com
http://cocoajava.com/java_feature_coffee_grounds.html

Recipecircus.com
http://recipecircus.com/recipes/Harper/TIPSnHINTS/Uses_For_Coffee_Filters.html


Irene Helen Zundel is a freelance writer, educator and mother, and an expert in child development, home schooling and creative parenting and home making.
Visit her online at http://www.irenehelenzundel.com

Reblog this post [with Zemanta]

About Me

My photo
I am a freelance writer, Reiki master, and educator, with diplomas in teacher's aide and child psychology, and numerous writing courses. I home schooled my son, who was born 10 weeks early and was expected to have developmental and learning lags. In 6th grade, he took an 8th grade standardized achievement test, and scored as a college sophomore in math and English. It inspired me to write a book, which I have given away for free! It is called Make your Kid a Genius, and can be downloaded at my website http://www.irenehelenzundel.com I am passionate about alternative healing methods; especially Reiki, aromatherapy, acupressure, therapeutic massage and music and sound therapy.